
A kitchen renovation is not just a cosmetic upgrade. Before the new benchtops and cabinetry are installed, significant electrical work must be completed.
Most homeowners focus on the exciting parts: the stone benchtop, the new cabinetry, the pendant lights above the island. What they often underestimate is the electrical infrastructure behind it all. Getting the electrical plan wrong – or leaving it as an afterthought – is one of the most common and costly mistakes in any kitchen renovation project.
As licensed Melbourne electricians (REC 25170), we have completed the electrical work on hundreds of kitchen renovations across Melbourne’s north-east, from Greensborough and Eltham through to Doncaster and Ivanhoe. In that time, we have seen every mistake a homeowner can make when planning a kitchen renovation – and we have fixed most of them.
This guide covers every key electrical consideration you need to understand before your build begins: new circuits, power points, lighting, appliance wiring, RCD protection, and whether you need a switchboard upgrade. Treat it as your complete electrical checklist before you call the kitchen designer.
Why Your Kitchen Renovation Needs a Licensed Electrician
In Australia, all electrical work must be carried out by a licensed electrician. This is not a guideline – it is the law. DIY electrical work in Australia is illegal, and unlicensed work can void your home insurance, create serious safety risks, and land you with fines. There are no exceptions for “small jobs” in the kitchen.
Beyond the legal requirement, engaging a licensed electrician early in the renovation process is sound project management. Your electrician needs to review the kitchen design plan before the cabinetmaker finalises any work. The placement of power points, the routing of circuits, and the positioning of appliances all affect one another, and all must be finalised before any wall is opened.
A typical kitchen renovation requires a minimum of two separate electrical visits:
- Rough-in – before plaster and cabinetry, when cables and conduit are run through the walls and ceiling
- Fit-off – after cabinetry and benchtops are installed, when fittings, power points and appliances are connected
Missing either phase or doing them out of sequence creates expensive rework. Electrical planning matters from day one.
The Complete List of Kitchen Electrical Work
Power Points
This is where most homeowners underestimate their power needs. A modern kitchen requires 6-8 power points along the benchtop, plus dedicated outlets for major appliances. Coffee machines, toasters, air fryers, blenders, and small appliances all need somewhere to plug in – and they all tend to be used at the same time.
Australian wiring rules (AS/NZS 3000:2018) set clear placement requirements for kitchen power points:
- Minimum 300 mm from the sink edge
- Not positioned behind or above a cooktop
- At least 150 mm above the benchtop surface
In addition to the general benchtop power points, consider:
- A dedicated outlet inside an appliance cupboard for a Thermomix or charging station
- USB ports built into selected power points for device charging
- A dedicated power point for the refrigerator – positioned so it can never be accidentally switched off
All kitchen power points must have RCD (residual current device) protection in accordance with AS/NZS 3000:2018. This is not optional. Any electrician who tells you otherwise is not someone you want working in your kitchen.
Dedicated Circuits for Appliances
One of the most important electrical considerations in a kitchen renovation is the allocation of dedicated circuits. Modern kitchen appliances draw significant electrical load, and sharing circuits between high-draw appliances is a fast way to trip a circuit breaker – or worse, cause a fault.
Here is what a modern kitchen typically requires:
| Appliance | Recommended Circuit | Cable Size |
|---|---|---|
| Electric oven | Dedicated 20A or 32A circuit | 4mm² or 6mm² |
| Induction cooktop | Dedicated 32A circuit (some models 40A) | 6mm² |
| Rangehood | Hardwired or dedicated power point | 2.5mm² |
| Dishwasher | Dedicated circuit recommended | 2.5mm² |
| Refrigerator | Dedicated circuit recommended | 2.5mm² |
That is a minimum of five dedicated circuits for appliances alone, before you factor in lighting circuits and general power circuits. Most professional electrical plans for a new kitchen include between five and seven additional circuits. In older homes, that almost always means a switchboard upgrade is part of the renovation plan.
Lighting
Good kitchen lighting is layered, not just a bank of downlights on a single switch. A well-designed kitchen electrical layout separates lighting into distinct zones that can be controlled independently.
A standard kitchen renovation lighting plan includes:
- General downlights – typically 6 to 10 across the main ceiling area, switched independently
- Under-cabinet lighting – LED strip lighting provides task lighting directly onto benchtop work areas, which is essential for food prep
- Pendant lights – over a kitchen island or breakfast bar, on a separate circuit
- Dimmer switches – for ambience control, particularly useful if the kitchen opens to a dining area
Colour temperature matters too. In work areas and food-preparation zones, a cool white (around 4000K) improves visibility. For dining zones or areas adjacent to the kitchen, a warmer tone (around 3000K) creates a more comfortable atmosphere. Getting this right at the rough-in stage avoids costly changes later.
Under-cabinet lighting is frequently added as an afterthought – but if the cables are not run during the rough-in phase, installing under-cabinet lights after cabinetry is fitted becomes significantly more difficult and expensive. Include it in the electrical plan from the start.
Switchboard Upgrade
Adding five to seven new circuits to an existing electrical system requires capacity in the switchboard. In many Melbourne homes – particularly those built before the 1990s – that capacity simply does not exist. Older switchboards with ceramic fuses lack the spare circuit slots required for a modern kitchen and do not provide RCD protection.
A full switchboard upgrade replaces the old fuse board with a modern unit that includes:
- A main switch
- Faster-tripping circuit breakers
- RCD safety switches (mandatory under current regulations)
- Spare capacity for future upgrades
A switchboard upgrade in Melbourne typically costs between $1,500 and $3,500, depending on the size and condition of the existing board. If your kitchen renovation adds multiple new circuits, factor this into your budget from the outset.
For a detailed breakdown of costs, read our full guide, Switchboard Upgrade Cost in Melbourne (2026 Guide).
Rewiring (If Required)
Homes built before 1980 sometimes have wiring that cannot safely be extended. Deteriorated TPS cable or aluminium wiring (common in homes built during the 1960s and 1970s) can create significant complications in a kitchen renovation project.
Aluminium wiring, in particular, cannot be directly connected to copper cable without special-purpose connectors. If your home has aluminium wiring and your kitchen is being fully gutted, it is worth having a licensed electrician assess the existing electrical system before your builder provides a quote. Discovering aluminium wiring mid-renovation adds time and cost that could have been budgeted for upfront.
A full kitchen rewire is not always required, but when the existing wiring is deteriorated or undersized for modern appliances, it is the safe and compliant approach.
Smoke Alarm Repositioning
A kitchen renovation often involves moving walls and changing ceiling layouts. If your renovation affects the ceiling or wall structure near existing smoke alarms, those alarms may need to be repositioned to comply with Victorian Building Regulations 2018.
One important note on placement: smoke alarms should never be installed directly in the kitchen. Cooking vapours and steam will repeatedly trigger false alarms. The correct position is in the hallway or room immediately adjacent to the kitchen.
For significant renovations in Victoria, interconnected smoke alarms may be required, meaning that when one alarm sounds, all alarms in the home sound. Your electrician can advise on whether your renovation triggers this requirement.
The Two-Phase Electrical Process: Rough-In and Fit-Off
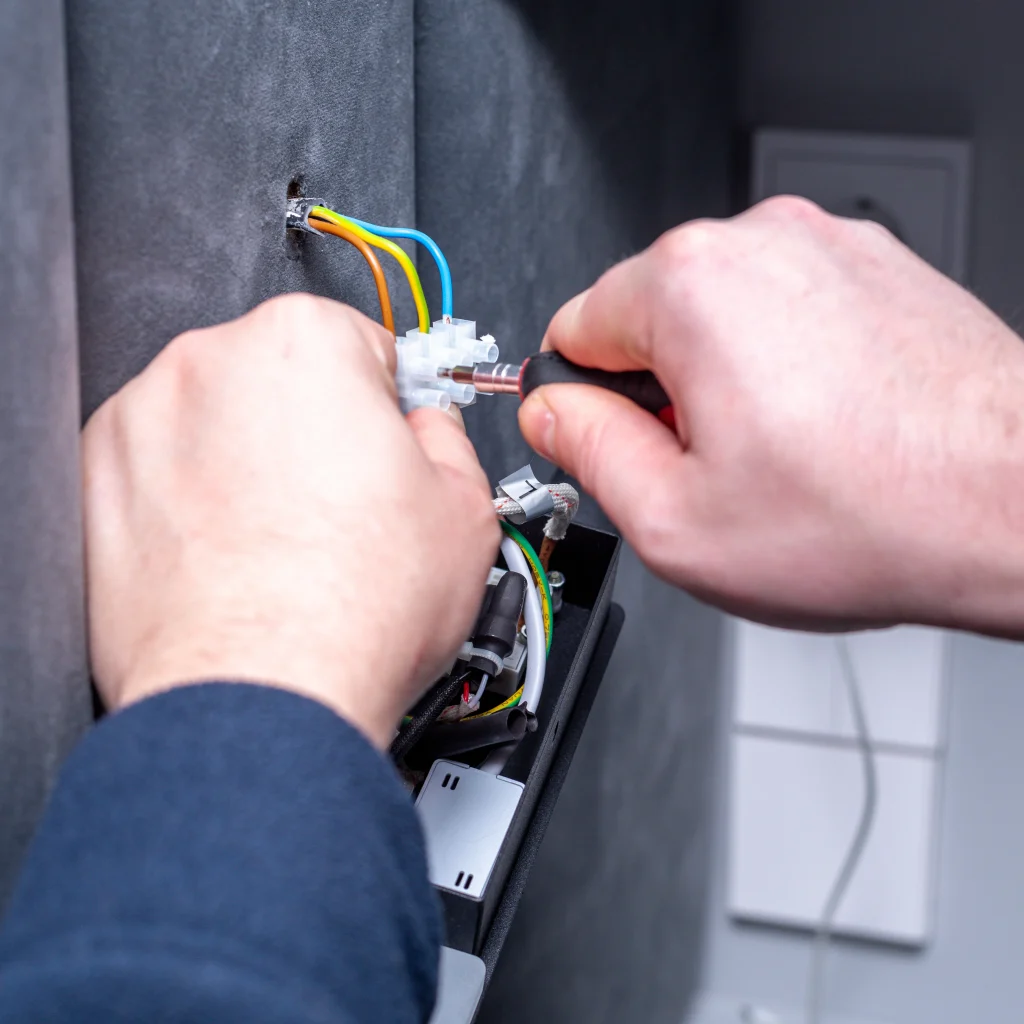
Phase 1: Electrical Rough-In
The rough-in is the hidden work: cables run through wall cavities and ceiling spaces, mounting brackets are installed for power points and light fittings, and all circuits are pulled back to the switchboard. This phase happens after demolition and framing, but before plasterboard and cabinetry.
Getting the rough-in right is critical. Once the walls are plastered and the cabinets are in, fixing a mistake means cutting open finished surfaces. A thorough electrical plan, reviewed before work begins, prevents this.
A typical kitchen rough-in takes one to two days, depending on the size of the kitchen and the number of circuits required.
Phase 2: Electrical Fit-Off
The fit-off happens after cabinetry, benchtops and splashbacks are installed. At this stage, the electrician connects power points, installs light fittings, hardwires appliances such as the rangehood, oven and cooktop, and tests every circuit.
Upon completion, your electrician will issue a Certificate of Compliance Electrical Work (CCEW) – or Certificate of Electrical Safety, as it is sometimes called in Victoria. This document is a legal requirement for all prescribed electrical work and confirms that the work complies with current electrical standards. Keep it – you will need it if you sell the home.
A typical fit-off takes one day.
What Does Kitchen Electrical Work Cost?
Costs vary depending on the scope of work, the age of your home and whether a switchboard upgrade is required. Here is a high-level summary:
| Service | Typical Cost (Melbourne) |
|---|---|
| Full kitchen electrical (mid-range renovation) | $3,000 – $8,000 |
| Full kitchen electrical (high-end renovation) | $8,000 – $15,000+ |
| Switchboard upgrade (if required) | $1,500 – $3,500 |
| Individual power point installation | $150 – $300 |
| Downlight installation (per light) | $80 – $150 |
These figures are indicative. A homeowner with a straightforward mid-range renovation in a home with a modern switchboard will sit toward the lower end. A home renovation involving older wiring, a full switchboard replacement and a high-end kitchen with a large island and multiple appliance circuits will sit toward the higher end.
For a detailed cost breakdown, read our full guide: How Much Does Kitchen Electrical Work Cost in Melbourne?
Kitchen Electrical Regulations You Should Know
All kitchen electrical installations in Victoria must comply with the following:
- AS/NZS 3000:2018 (Wiring Rules) – the national standard governing all electrical installations
- RCD protection – mandatory on all kitchen power points under AS/NZS 3000:2018
- Certificate of Compliance Electrical Work (CCEW) – required for all prescribed electrical work in Victoria
- Energy Safe Victoria (ESV) – the regulator overseeing electrical safety and licensed electricians in Victoria
Work must comply with all applicable regulations, and only a licensed electrician (or a Registered Electrical Contractor) may legally perform electrical work. If you are converting from gas to induction, your electrician will need to address additional considerations for circuit sizing and load calculations during the design process.
Common Questions
Do I need an electrician for a kitchen renovation?
Yes. All electrical work in Australia must be performed by a licensed electrician. This includes power points, lighting, circuits and appliance wiring. There are no exceptions.
How many power points do I need in a kitchen?
At minimum, 6-8 along the benchtop area, plus dedicated outlets for the fridge, dishwasher, and any hardwired appliances. If you have a kitchen island, factor in additional power points there as well.
Can I move power points in my kitchen myself?
No. Moving, adding or modifying power points is prescribed electrical work that must be done by a licensed electrician in Victoria. DIY electrical work in Australia is illegal and unsafe.
How long does the electrical part of a kitchen renovation take?
Typically, one to two days for the rough-in and one day for the fit-off, spread across the broader renovation timeline.
Do I need a switchboard upgrade for a kitchen renovation?
In many older Melbourne homes, yes. Adding five to seven new circuits often exceeds the existing switchboard’s capacity, and older fuse boards without RCD protection must be upgraded to meet current electrical standards.
What is the correct order of trades in a kitchen renovation?
The ideal sequence is: demolition, framing, electrical rough-in, plumbing rough-in, plasterboard, cabinetry, tiling and splashback, electrical fit-off, and final plumbing. Your electrician needs to be involved before the plasterer arrives – not after.
Planning a Kitchen Renovation? Start with the Electrical Plan.
A new kitchen should be designed around a solid electrical layout – not retrofitted with one. Get the circuits, power points, lighting and appliance wiring locked in early, and you will avoid the most common and costly mistakes that send kitchen renovations over budget.
As licensed Melbourne electricians with a 5-star Google rating and a 100% satisfaction guarantee, Statewide Sparkies work with homeowners across Melbourne’s north-east to ensure your kitchen renovation is executed safely, to code, and on time.
Call Statewide Sparkies on 0435 877 448 for a free consultation and quote. We serve Greensborough, Eltham, Diamond Creek, Templestowe, Doncaster, Ivanhoe, Heidelberg, Northcote, Thornbury and all of Melbourne’s north-east.
Related Posts:
How Much Does Downlight Installation Cost in Melbourne? (2026 Price Guide)